Showing posts with label DIY. Show all posts

8.21.2014

Running Bibs & Medal Hanger - a tutorial

I recently hosted a Moms Night Out (MNO) for my local running group; Moms Run This Town. As runners we participate in races where we get bibs and many times medals. Wanting to have a way to display our accomplishments, this was the perfect craft for our group.

These are so popular that I've had many other runners ask for a tutorial. So here it is!

Supplies for a 24"x 7" horizontal hanger
1 - 24"x 7" board - I purchased pre-cut Hobby Board from Home Depot  $5.77 each
8 - L Hooks - I purchased packs of 100 from Amazon.com
2 - Sawtooth photo hangers 
Paint of your choice
Vinyl Sticker with saying (I cut myself using my Silhouette Cameo)
Paint brush
Hammer
Needle nose pliers
Something like an ice pick to punch the holes for L Hooks
Ruler
credit card for smoothing sticker

Gather your supplies
I only had 1 L hook left, so only one is shown - but for this board you should have 8.


Paint your board in a color of your choice
 Decide where you want to place your bibs and medals. Take your "ice pick" and hammer and punch holes. You do not have to go all the way through, this just makes it easier to get the L hooks screwed in. You can even pre-make a paper template; I recommend doing this if you are making a lot.
 
 Turn board over and attach sawtooth picture hangers. Be careful not to nail all the way through to the front of the board!

Next you will attach your sticker. The red dots shown in the photo are where the holes would be for the hooks. Decide exactly where you want your sticker.


Peel the backing off of your sticker. The saying should be sticking to the clear paper. Place carefully on the board.

Once the sticker is down, take a credit card and rub your saying onto the board.

Start to peel the plastic off of your saying. GO SLOWLY. If your letters aren't sticking to the board, lay the plastic back down and rub some more. I repeat - GO SLOWLY.

Next you will add the hooks to the front of your board. Slowly screw them in, using the needle nose pliers for grip if you need some help. If you are having trouble getting your hooks started screwing in, you might need to punch the holes a little larger.

Bib hooks were placed 7"apart. For bibs that are larger, you can hang two sets of hooks, or do what I do and just punch new holes in the bib so they can hang.


Medal Hooks are 3/4" from the bottom and about 2"apart.


When you are done, take your board and fill it up with all of your bling!


And check out these awesome moms - this is only about 1/2 of whom came to the MNO. Lots of great saying and accomplishments being showcased. So get some supplies and make one for yourself. They are easy and awesome!


2.08.2013

Valentine's Day Cards

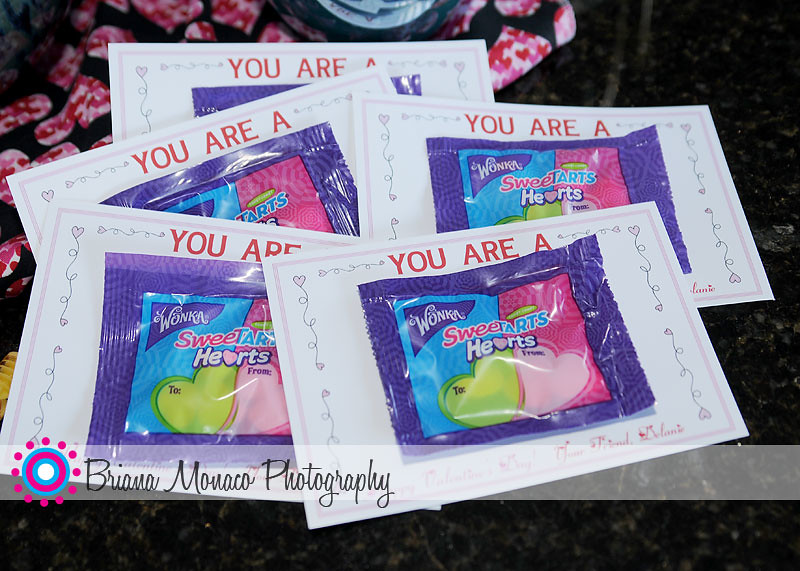
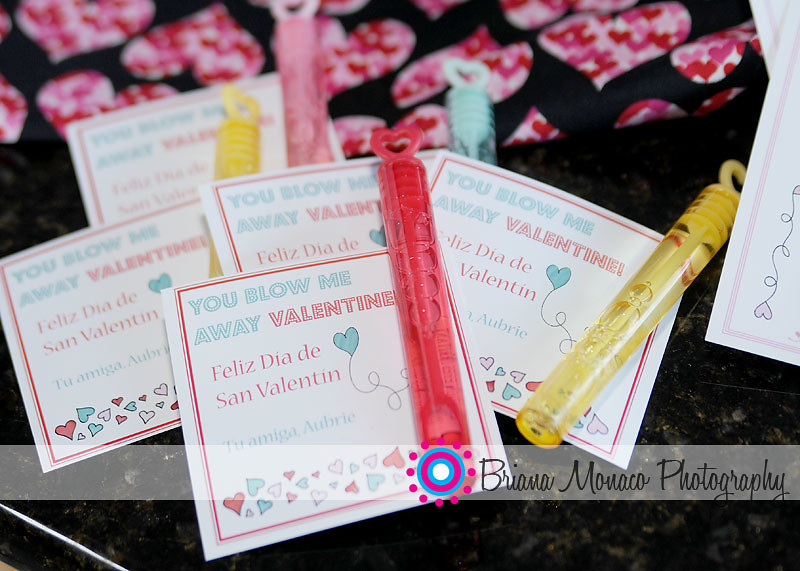
I love that my younger girls still allow me to make and help them with their Valentine's Day cards for the class exchange. There's just something fun about having one of a kind Valentine's for your friends. Usually the girls do something that is same, maybe just in a different color. But this year they picked different things. Aubrie found some cute little bubble wands at Target, so wanted to use those in her Valentines. Delanie wanted to use candy and she picked SweeTarts Hearts.

 For the bubbles I found THIS idea on Pinterest and My Sister's Suitcase blog. I created a 3" x 3" card and put my spin on it and added some Spanish since Aubrie is in a Dual Immersion program. The bubbles are attached with a small glue dot. She loves them and can't wait to pass them out to her friends next week.
 

Valentine's 2013

Delanie picked candy to go with her Valentine. We went with a YOU ARE A "Sweetheart" idea. I designed the card and printed it on 4x6 photo paper. The candy is attached to the center of the card with a glue dot.
 Valentine's 2013

 There you have it, easy and cute custom Valentine's Day cards! Happy Valentine's Day!

And because Aubrie wanted to take a "to eat" treat, I threw some goldfish in a snack size ziploc bag and put a little note with it. Perfect.

Another quick treat for D's class. #valentine #greatcatch #goldfish

1.30.2013

100th day of school!

The girls celebrated the 100th day of school today and of course I didn't realize it was the 100th day of school until the night before. Ooops! But I of course wanted to make a little something for the middle girls to wear to school. The girls *really* wanted a 100 eyed monster shirt, but I didn't have 200 googly eyes and it was 9pm the night before. So no, that wasn't happening. So I hopped over to Pinterest to see what else I could find and I found this idea. Very easy concept and I made it even easier by just writing the tally marks with a fabric marker. Easy peasy lemon squeezie. I also add "100 days of school" and "100 dias de escuela" to the shirts, just because I felt it needed a little something else. Aubrie's is in Spanish, because well, she's in Spanish immersion. 

Now a quick tutorial:
Gather your tools - shirt, fabric marker(s)
Tally your shirt up to 100
Add some text if you want to the bottom
Have a cute kid wear the completed shirt and snap some photos in front of your outdoor chalkboard. OK, the outdoor chalkboard photos isn't mandatory, but they are pretty cool, right? If you're interested in outdoor chalkboards, here's a tutorial for that. :)

And there you have it: a very easy and quick 100 Days of School shirt!

100th Day of School 
100th Day of School

12.21.2012

Class Treats - Christmas

Nothing like a class treat for the kids to take home over Christmas Break.

Hot chocolate and marshmallows. The second batch I added a small candy cane. The kids loved them!
hot cocoa take home treats for 1 of the littles class. #hotchocolate #classtreat #christmas #holiday #sweets

11.19.2012

Thanksgiving Treats

Yep, another Pinterest idea. Found this cornucopia idea HERE. The kids love them. Aubrie wanted the Cornucopia mix and Delanie wanted Candy Corn & Pretzels.

Thanksgiving Treats

I was a bit crunched for time, so I didn't use the bag topper like I normally do, besides the kids are just going to rip them open and eat them anyway.


Cornucopia Snack Mix
Snack Size Ziploc Bags
Bugles,  Runts,  Printable
Mix up the Bugles and Runts.
 Bag.
Add printable and seal.
Done.

Candy Corn/Pretzel Snack Mix
Snack Size Ziploc Bags
Pretzels & Candy corn
Mix up the Pretzels & Candy Corn.
Bag.
Add printable and seal.
Done.

Yea, I know. You probably don't need a tutorial for this.

8.29.2012

DIY - Car Seat Tents

I'm sure you've seem them around - Etsy, Pinterest and the the like. Car Seat Tents are an easy way to protect your baby (or in my case babies) from the grubby hands of strangers. :)

They are very easy to make - and pretty inexpensive if you get fabric on sale. There are lots of Etsy that are super fancy, with zippers, border fabrics, bows and more. I wanted to whip these up quickly, so I chose to forgo those fun goodies. Here's what you need for a simple lined car seat tent.

Supplies:
1 1/4 yard front fabric (at least 45" wide)
1 1/4 yard back fabric (at least 45" wide)
Velcro
Matching thread

Step One:
Cut your front and back fabric to 36" wide x 42" long.

Step Two:
Lay front and back together RIGHT sides together. Pin all the way around.

Step Three:
Use a large bowl and place in each corner - this is how you'll get the curve of the edges. Trace with a disappearing fabric pen or pencil. Cut your corners along the curve and make sure to repin.

Step Four:
Sew along all edges, leaving an opening to turn the tent right side out.

Step Five: (Optional)
Clip your rounded corners with pinking shears so that your corner seams will lay flat.

Step Six:
Turn tent right side out and push all of the fabric to the seams.

Step Seven:
Iron your seams and pin your opening closed.

Step Eight:
Sew your opening closed and then continue around the entire tent.

Step Nine:
Cut pieces for your straps - 2 pieces of your front fabric and 2 pieces of your back fabric (4 total). I made mine 4" wide x 9 1/2" long.

Step Ten:
Lay front and back together RIGHT sides together. Pin all the way around.

Step Eleven:

Sew along all edges, expect one short edge - this will allow you to turn the handles right side out.

Step Twelve:
Turn handles right side out - push all fabric to the seams.

Step Thirteen:

Iron your seams and pin your opening closed.

Step Fourteen:
Sew your opening closed and then continue around the handle.

Step Fifteen:
Cut your velcro to the width of the strap. Then place your velcro where you want it, making sure that they are the correct sides of the handle so they fasten together. Sew your velcro on.

Step Sixteen:
Finally you will want to attach your handles to the seat. Place your tent over your car seat. Place your handles where you want them on the handle - many tutorials give a ballpark of about 19″ inches from the top and 11 1/2″ from each side and about 5 1/2″ between each strap and about 21″ from the strap to the bottom. You can tweak this to fit your seat/handle though.

Mark where you want you straps with a disappearing fabric pen or pencil. Take you tent and pin your handles on.

Sew your handles in the center of the length making a box by going from edge to edge.

That's it! Your tent is done. It seems like a lot of steps, but I just broke them down to very simple terms, anyone can do this. Enjoy!

Car Seat Tents

6.06.2012

End of the Year Treats

The end of the school is just a hop, skip and a jump away. That means that it's time for End of the Year gifts, for teachers and friends. Thanks to my lovely friend, Pinterest, I found this cute little idea and thought it would be perfect for D's teachers.

Ice Cream Teacher Gifts
While perusing Pinterest once again, I found this idea and thought that they would be great for the little girls friends. Just a little something sweet to celebrate summer!

Smartie Pants 
 So there you have it. I just hope I can keep up with this stuff once the twinsies are here!

3.20.2012

St. Patty's Day Treats

I wanted to send a little some to the first grade and Pre-K classes for St. Patty's Day. I found this idea on Pinterest. Super cute and easy too! I just modified it a bit to fit the girls and ta-da!

What you need:

Rainbow Twizzlers (I cut mine in half and used almost 4 bags to make 36.)
Rolos (I think I used almost 3 bags for 36)
Treat bags (I got the smaller ones from the cake decorating section at JoAnn's)
Header (designed my own)
Stapler

- Cut your Twizzlers in half.
- Put 4 rolos (or chocolate coins if you so wish) into the bottom of each bag.
- Take 1 piece of each color of the rainbow in Twizzlers and put them in the bag.
- Staple your header to the top.
- DONE. Enjoy!

St. Patty's Treat

3.16.2012

Lephrecauns, houses and gold. Oh my!

There's been a lot of talk about leprechauns lately. You know, with St. Patrick's Day coming up. The girls have been talking about trying to catch one. They decided that an inviting house would have better luck catching OUR leprechaun. Who is so aptly named, Lucy the Leprechaun. The last few days have been spent designing a nice dwelling for Lucy. Complete with rainbows, flowers, gold and a leprechauns favorite snack, Lucky Charms.

Come on in!

We added a little incentive the back of the house/trap. Because we all know that leprechauns LOVE gold, and Lucy is no exception.

Gold Inside

Follow the arrows

Lucy came.

Leprechaun footprints

But alas she decided to play a few tricks, snatch the gold and leave green little footprints to prove that she can outsmart any trap!

Leprechaun footprints

But she's a sweet leprechaun too. She left a sweet tiny leprechaun note and some shamrock necklaces for 4 sweet little girls.

Tiny leprechaun notes

Happy St. Patrick's Day, all! Hope you were able to catch your leprechaun!

3.12.2012

It's a RAINBOW party!

Our sweet Aubrie is turning 5 at the end of the month. To celebrate the big event she requested a party of rainbows, rainbows and MORE rainbows! Being that we haven't thrown her a big bash since her first birthday, who was I to argue?

What a day full of color it was!

Rainbow Balloons

Desserts

Goodie Bags filled with rainbow treats!

Goodie Bags

Happy Birthday sign

Sweets

Cake

Rainbow Pom-poms

Rainbow Wreath

A Rainbow of Fruit!
Rainbow Fruit

Candles

Rainbow Cake

The MAIN request of this party was the BIG rainbow cake I made last year. It was delicious!
Rainbow Cake

Thank you to all of our friends and family for joining us and showering our girl with love (and gifts.) :)
Birthday Girl

2.06.2012

Valentine's!

I saw this Valentine on a blog a couple of years ago - I don't remember which one though. But it's been around and is on Pinterest this year too. I thought it was super cute and thought they would be cute to do for the girls classmates.

Here's what you need.

Printed Photo of your kiddo holding their hand out in a fist. (Like they are holding a lollipop.) Have them put their hand a little to one side so the lollipop doesn't cover their face too much.
Lollipops (I used the heart shaped ones, but I've seen them done with Tootsie Pops and Blow Pops as well)

Print as many photos as you need.
Cut a small line at the top and bottom of the hand that they are holding out. (I cut a small x - it was easier to slip the lollipop in.)
Slide the lollipop in through the front at the top and from the back at the bottom.

There you have it - Valentine's Day card complete.

D Valentine's

I also made some mailboxes for the girls last year, but for some reason they have gone missing. So I decided to make some news ones - sinc they are only $1.00 at Target. The girls get to check them everyday for love notes and special treats. They love it!

Valentine's Mailboxes

Tulle Wreath - Tutorial

So I recently made a tulle wreath for a baby shower. It was very easy and turned out SO CUTE! I am excited to make another one for Easter!

Here's what you'll need.
Wreath - I used the FloraCraft plastifoam. That was it wouldn't make a mess. I also don't remember what size it was probably 10"-12"
Tulle - I used 12 yards (4 colors - 3 yds each)
Ribbon
Any decorations you want to add

Cut your tulle in 3" strips.
Decide you far you want your tulle to stick out from your wreath, then double the amount and cut your tulle. I made my tulle a little longer than I wanted, then I trimmed it around the wreath. It stuck out about 6".
Wrap your piece of tulle around the wreath and double knot.
Alternate the colors as you want and continue around the wreath.
If you want to add some accents you can. I added the JC to a ribbon and hot glued it to hang in the center of the wreath. I also needed to add a ribbon to the top to hang it.

It's a very easy project and I did in in a evening while I watch cartoons with my girls. :)

Ta-da!

Tulle Wreath

Baby Shower - Clouds

I've been planning a baby shower for the past couple of months for my sister-in-law. It was this past weekend and I have to say it turned out pretty darn well. :)

I choose a "Showered with Love" theme, since it was something different and sweet. And I was able to hang out on Pinterst and find some cute ideas to have everything come together.

Here were the invitations I designed.
Invite


Here is the tulle wreath that hung on the front door. (I had a couple people ask for a tutorial, so I'll post that soon.)
Tulle Wreath

At the last minute I decided to make a banner to hang above the patio doors. I'm never satisfied. ;)
Showered with Love

I've wanted to use mason jars for drinks at a party for long time, so this was perfect. I added paper straws with a cloud accent to add that extra touch of cuteness.
Mason Jars & Paper Straws

Instead of doing a cake, I made cupcakes with cloud toppers.
Cupcakes

I also made chocolate dipped marshmallow pops & rice krispie treats. Hard to believe those would have been such a hit with the ladies!
Marshmallow Pops

Chocolate Dipped Rice Krispie Treats

For favors I found this blog and thought the cookie jar/baby bottles were very cute! Those were my plan until I found out that the nipples I was going to need were a couple of dollars a piece. So instead I used a cute raindrop fabric for the lid. They were a hit!
Cookie Favors

I also baked a batch of cookies, so the guests could sample them. They are really yummy. (Also behind the cookies I had a framed print with lots of baby boy words - just a little something extra.
Cookie Favors

Favors

I also found this on another blog and KNEW I had to make one. So easy and cute!
'Motorcycle

I ended up having to throw together some appetizers, and decided that instead of using my veggie tray for the veggies, I'd use glasses. So cute!

Appetizers

And we didn't really play any games. Just the "Don't say baby" game. But I did create a Wishes and Advice for the guests to give to the mama. Then I read them and she had to try and guess who wrote it. She got a couple right. ;)
Wishes and Advice

All in all it was a great day. Happy Baby Shower!